Product Code
|
UTS-2060.SMPR
|
Automatic Direct - Residual Shear Test Machine
|
|
UTS-2065
|
Shear Box Assembly, 60x60 mm
|
|
UTS-2065-7
|
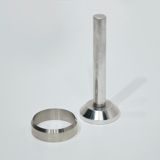
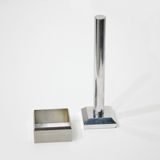
Cutting Ring, 60x60 mm
|
|
UTS-2065/8
|
Extrusion Dolly, 60x60 mm
|
|
UTS-2066
|
Shear Box Assembly, Ø 60 mm
|
|
UTS-2066-7
|
Cutting Ring, Ø 60 mm
|
|
UTS-2066-8
|
Extrusion Dolly, Ø 60 mm
|
|
UTS-2067
|
Shear Box Assembly, 100x100 mm
|
|
UTS-2067-7
|
Cutting Ring, 100x100 mm
|
|
UTS-2067-8
|
Extrusion Dolly, 100x100 mm
|
|
UTS-2068
|
Shear Box Assembly, Ø 100 mm
|
|
UTS-2068-7
|
Cutting Ring, Ø 100 mm
|
|
UTS-2068-8
|
Extrusion Dolly, Ø 100 mm
|
|
UTS-2069
|
Shear Box Assembly, Ø 2.5 inch
|
|
UTS-2069-7
|
Cutting Ring, Ø 2.5 inch
|
|
UTS-2069-8
|
Extrusion Dolly, Ø 2.5 inch
|
|
UTS-2100
|
Slotted Weight Set, 50.75 kg
(4x10 kg + 1x5 kg + 2x2 kg + 1x1 kg + 1x0.5 kg + 1x0.25 kg)
|
|
Models for 220-240V 50-60 Hz, 1 ph
|
UTS-2060.SMPR
|
|
Models for 110-120V, 60Hz, 1ph
|
UTS-2060.SMPR -N
|
Standards
ASTM D3080; BS 1377:7; AASHTO T236, TS 1900-2, CEN-ISO-TS 17892-10
The test covers the determination of consolidated drained shear strength of a soil material by direct shear. UTS- UTS-2060.SMPR Automatic Direct - Residual Shear Test Machine is motorized and floor mounted. Normal stress is applied to the specimen by utilizing a weight hanger, a lever arm (amplification ratios of 9:1, 10:1 and 11:1), and a vertical loading yoke. Hanger can receive up to 50 kg of weight which is amplified by the lever arm and transferred to the specimen by the vertical loading yoke as a normal force up to 5 kN (5000 N).
The machine is supplied with a shearbox bowl that accepts 60 mm square, 100 mm square, 60 mm dia. round, 100 mm dia. round and 2.5 inc. dia. round shearboxes. Shearbox bowl is designed to contain water to inundate the specimen during the test. The shearbox assemblies consist of rigid upper and lower shearbox frames with lifting and locking screws, a grooved loading pad, a grooved base plate, bronze porous plates (2 pcs.), and perforated plates (2 pcs.).
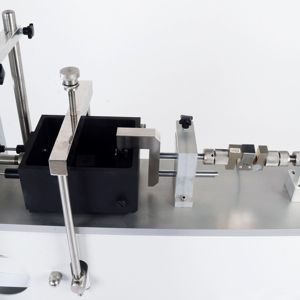
Drive unit utilizes a high resolution servomotor and a gear box assembly to ensure continuously variable transmission of speed in a range from 0.00001 mm-min. to 15 mm-min for both forward and reverse directions. 5 kN load cell is used for load measurement. 10 x 0.001 mm and 25 x 0.001 mm sensitivity linear potentiometric transducers are used for vertical and horizontal displacement measurements respectively. Displacement limits are controlled by limit switch.
Shearbox Assemblies, Slotted Weight Set and other optional accessories including cutting ring and extrusion dolly should be ordered separately.
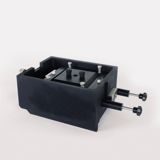
UTS-2065
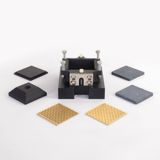
UTS-2067
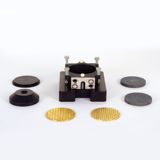
UTS-2068
|
Accessories of Shear Box Assemblies
|
|
The Model of Shear Box
|
UTS-2065
60x60 mm
|
UTS-2066
Ø:60 mm
|
UTS-2067 100x100
|
UTS-2068
Ø:100 mm
|
UTS-2069
Ø:2,5 inch
|
|
Shear Box
|
UTS-2065-01
|
UTS-2066-01
|
UTS-2067-01
|
UTS-2068-01
|
UTS-2069-01
|
|
Loading Cap
|
UTS-2065-02
|
UTS-2066-02
|
UTS-2067-02
|
UTS-2068-02
|
UTS-2069-02
|
|
Grooved Retaining Plate
|
UTS-2065-03
|
UTS-2066-03
|
UTS-2067-03
|
UTS-2068-03
|
UTS-2069-03
|
|
Porous Plate
|
UTS-2065-04
|
UTS-2066-04
|
UTS-2067-04
|
UTS-2068-04
|
UTS-2069-04
|
|
Perforated Plate
|
UTS-2065-06
|
UTS-2066-06
|
UTS-2067-06
|
UTS-2068-06
|
UTS-2069-06
|
|
The Optional Accessories of UTS-2060 Automatic Direct / Residual Shear Test Machine
|
|
Specimen Cutter
|
UTS-2065-07
|
UTS-2066-07
|
UTS-2067-07
|
UTS-2068-07
|
UTS-2069-07
|
|
Extrusion Dolly
|
UTS-2065-08
|
UTS-2066-08
|
UTS-2067-08
|
UTS-2068-08
|
UTS-2069-08
|
* 2 pcs. supplied with the shear box assemblies
UTS-2064
UTS-2069
U-Touch PRO Control Unit
The U-Touch PRO Control Unit is designed to control the machine to perform direct - residual shear test acc. to EN,ASTM/AASHTO and BS standards to process.
The Unit can perform direct - residual shear tests as a stand-alone without the use of a PC or with the USOFT-2060 software and a PC. Control of machine, acquisition of load and displacement data in real time are provided by the unit
The U-Touch PRO has easy to use menu options. It displays all menu option listings simultaneously, allowing the operator to access the required option quickly to activate that option or enter a numeric value to set the test parameters and see all the data while the test running.
The U-Touch PRO graphic display allows real time Load vs. Displacement or Stress vs. Displacement graph. The advanced functions for data base management provide an easy navigation of all saved data. The test results certificate includes all descriptive information. Therefore, test parameters can be set, and details about the test carried out such as customer details, test type, specimen type, user info and other information required can be entered and printed out as well as test reports and graphs. Also, all minor revisions can be implemented upon request. The Software calculates both the maximum and resilient shear stress.
After three runs, the software calculates the cohesion value “c” and shear resistance angle”φ” by using the best straight line fit. Q
Main Features
• Can make the test with displacement control
• Real time display of test graph.
• 4 analog channels for load cell and displacement sensor
• Calibration function for channels.
• Programmable digital gain adjustment for load-cell and potentiometric sensors, voltage and current transmitters
• Closed-loop PID for steady pace rate
Consolidation
• 25 pairs of time-vertical displacement values are written to memory.
• The vertical displacement value can be tared prior to recording.
• The analogical channel reading vertical displacement has 260000 points effective resolution.
• The memory can be exported to PC software.
Testing
• 3 different shearing test types can be selected.
• The machine run with the speed determined by user to the direction of shear and stop when the load decreases.
• The machine run with the speed determined by user to the direction of shear and stop when it reaches to the target horizontal displacement value which is also determined by the user at the beginnig of the test.
• The machine run with the speed to the direction of shear, after reaching to the target displacement, returns and finds the exact initial (HOME) position, waits for the dissipation of excess pore pressure and starts to the same procedure again. User can create testing scenarios by determining all the parameters of this multi-reversal shearing test such as test speed, return speed, displacement target, standby time, and cycle number.
• By using the control unit, consolidation before shearing tests are possible.
• The screen displays load, shear stress, horizontal and vertical displacements, and τ-Δx graph continuously.
PLEASE see the pages of “General/Data Aqusition and Control Units” for details of the properties of software and hardware of U-Touch PRO Control Unit.
USOFT-2060 UTEST Software for Direct/Residual Shear Test
Utest Direct and Residual Shear Software is developed in accordance with ASTM D3080, BS 1377:7 and AASHTO T 236 standards to be used with UTS-2060.SMPR Machine.
Direct residual and shear software consist of two sections. First section is used for the consolidation of the sample prior to shear.
The second section of the software is capable of performing three different types of test. The first type moves the machine with the speed determined by user until a shear failure occurs. On the second type, the user can set a speed and a horizontal displacement and the test will continue until the machine reaches to the set value.
On the last type of test, the machine can be configured for cyclic (multireversal) operation. In cyclic mode device will advance to the determined distance with an assigned speed and turn back to the initial (home) position with a different assigned speed, wait for a time for the dissipation of excess pore pressure and start to the new cycle again.
All these test parameters such as forward-reverse speed, distance, cycle number, etc. can be defined by the user.
The software supports 5 different normal load values in order to calculate cohesion (C) and internal friction angle (Ø) values. Prior to the test normal load value must be entered to the software.
The normal stress is calculated according to normal load and sample size automatically.
The software supports both square and round type samples.
Stress values can be optionally and automatically calculated as “standard area” and the “corrected area” approach. When the test is completed peak and residual stress values are recorded.
The normal load versus peak stress pair is used for the calculation of cohesion and internal friction angle value. At least 3 loading with different normal loads are required for this property.
One can set test speed, axis values etc. through the setup of the software. The results can be submitted as a report or can be exported to Microsoft Excel for advanced reanalyze procedures.

The Automatic Direct Residual Shear Test Machine is supplied complete with;
- Load Cell 5 kN
- Linear Potentiometric Displacement Transducer (10x0.001 mm)
- Linear Potentiometric Displacement Transducer (25x0.001 mm)
- Software
|
Speed Range
|
0.00001 to 10,00 mm/min
|
|
Maximum Shear Force
|
5 kN (5000 N)
|
|
Maximum Vertical Load
|
0 to 500 N
|
|
Horizontal Travel
|
30 mm
|
|
Dimensions
|
450x1250x1200 mm
|
|
Weight (approx.)
|
110 kg |
| Power |
1100 W |